一 : CSS样式:background-position的理解
background-position:url(图片) 水平(X) 垂直(Y)
如果水平(X)为正数、垂直(Y)为负数,表示以图片的右上角为坐标,移动各个位移,如 8 -8 (以右上角,向右移8PX 向上移8px);
如果水平(X)为负数、垂直(Y)为负数,表示以图片的左上角为坐标,移动各个位移,如 -8 -8 (以左上角,向左移8PX 向上移8px);
如果水平(X)为正数、垂直(Y)为正数,表示以图片的右下角为坐标,移动各个位移,如 8 8 (以右下角,向右移8PX 向上移8px);
如果水平(X)为负数、垂直(Y)为正数,表示以图片的左下角为坐标,移动各个位移,如 8 8 (以左下角,向左移8PX 向上移8px);
二 : CSS背景background、background-position使用详解
CSS背景background、background-position使用详解
这篇文章主要介绍了CSS背景background、background-position使用方法,需要的朋友可以参考下
背景(background)是css中一个重要的的部分,也是需要知道的css的基础知识之一。(www.61k.com)这篇文章将会涉及css背景(background)的基本用法,包括诸如 background-attachment 等的属性,也会介绍一些有关背景(background)的常用技巧,以及 css3 中的 背景(background)(包含4个新的背景(background)属性)。
css2 中的背景(background)
概述
CSS2 中有5个主要的背景(background)属性,它们是:
* background-color: 指定填充背景的颜色。
* background-image: 引用图片作为背景。
* background-position: 指定元素背景图片的位置。
* background-repeat: 决定是否重复背景图片。
* background-attachment: 决定背景图是否随页面滚动。
这些属性可以全部合并为一个缩写属性: background。需要注意的一个要点是背景占据元素的所有内容区域,包括 padding 和 border,但是不包括元素的 margin。它在 Firefox, Safari ,Opera 以及 IE8 中工作正常,但是 IE6 和 IE7 中,background 没把 border 计算在内。
background-position CSS背景background、background-position使用详解

基本属性
背景色(background-color)
background-color 属性用纯色来填充背景。[www.61k.com)有许多方式指定这个颜色,以下方式都得到相同的结果。

1.
2.
3.
background-color: blue; background-color: rgb(0, 0, 255); background-color: #0000ff; background-color 也可被设置为透明(transparent),这会使得其下的元素可见。 背景图(background-image)
background-image 属性允许指定一个图片展示在背景中。可以和 background-color 连用,

因此如果图片不重复地话,图片覆盖不到地地方都会被背景色填充。代码很简单,只需要记住,路径是相对于样式表的,因此以下的代码中,图片和样式表是在同一个目录中的。
background-position CSS背景background、background-position使用详解
但是如果图片在一个名为 images 的子目录中,就应该是:

糖伴西红柿:使用 ../ 表示上一级目录,比如 background-image: url(../images/image.jpg); 表示图片位于样式表的上级目录中的 images 子目录中。[www.61k.com)有点绕,不过这个大家应该都知道了,我就不详说了。
背景平铺(background-repeat)
设置背景图片时,默认把图片在水平和垂直方向平铺以铺满整个元素。这也许是你需要的,但是有时会希望图片只出现一次,或者只在一个方向平铺。以下为可能的设置值和结果:

1.
2.
3.
4.
5. background-repeat: repeat; /* 默认值,在水平和垂直方向平铺 */ background-repeat: no-repeat; /* 不平铺。图片只展示一次。 */ background-repeat: repeat-x; /* 水平方向平铺(沿 x 轴) */ background-repeat: repeat-y; /* 垂直方向平铺(沿 y 轴) */ background-repeat: inherit; /* 继承父元素的 background-repeat 属性*/

【重点】背景定位(background-position)
background-position 属性用来控制背景图片在元素中的位置。技巧是,实际上指定的是图片左上角相对于元素左上角的位置。
下面的例子中,设置了一个背景图片并且用 background-position 属性来控制它的位置,同时也设置了 background-repeat 为 no-repeat。计量单位是像素。第一个数字表示 x 轴(水平)位置,第二个是 y 轴(垂直) 位置。
1.
2.
4.
5. /* 例 1: 默认值 */ background-position: 0 0; /* 元素的左上角 */ 3. /* 例 2: 把图片向右移动 */ background-position: 75px 0;
background-position CSS背景background、background-position使用详解
6.
7.
8.
10. /* 例 3: 把图片向左移动 */ background-position: -75px 0;

9. /* 例 4: 把图片向下移动 */
11. background-position: 0 100px;
background-position 属性可以用其它数值,关键词和百分比来指定,这比较有用,尤其是在元素尺寸不是用像素设置时。(www.61k.com]
关键词是不用解释的。x 轴上:
* left* center* right
background-position CSS背景background、background-position使用详解
y 轴上:
* top* center* bottom
顺序方面和使用像素值时的顺序几乎一样,首先是 x 轴,其次是 y 轴,像这样:

扩展:css position 详解 / css position属性详解 / background position
使用百分数时也类似。[www.61k.com)需要主要的是,使用百分数时,浏览器是以元素的百分比数值来设置图片的位置的。看例子就好理解了。假设设定如下:

This goes 100% of the way across the image (i.e. the very right-hand edge) and 100% of the way across the element (remember, the starting point is always the top-left corn
er), and the two line up there. It then goes 50% of the way down the image and 50% of the way down the element to
line up there. The result is that the image is aligned to
the right of the element and exactly half-way down it. 糖伴西红柿:这一段没想到合适的翻译,保留原文,意译。
update: 感谢天涯的指教,这段搞明白了。使用百分数定位时,其
实是将背景图片的百分比指定的位置和元素的百分比位置对齐。也
就是说,百分数定位是改变了背景图和元素的对齐基点。不再像使用像素和关键词定位时,使用背景图和元素的左上角为对齐基点。
例如上例的 background-position: 100% 50%; 就是将背景图片
的 100%(right) 50%(center) 这个点,和元素的 100%(right) 5
0%(center) 这个点对齐。

这再一次说明了,我们一直认为已经掌握的简单的东西,其实还有我们有限的认知之外的知识。
一半,效果和 background-position: right center; 一样。
background-position CSS背景background、background-position使用详解

背景附着
background-attachment 属性决定用户滚动页面时图片的状态。(www.61k.com]三个可用属性为 scroll(滚动),fixed(固定) 和 inherit(继承)。inherit 单纯地指定元素继承他的父元素的 background-attachment 属性。
为了正确地理解 background-attachment,首先需要明白页面(page)和视口(view port)是如何协作地。视口(view port)是浏览器显示网页的部分(就是去掉工具栏的浏览器)。视口(view port)的位置固定,不变动。
当向下滚动网页时,视口(view port)是不动的,而页面的内容向上滚动。看起来貌似视口(view port)向页面下方滚动了。如果设置 background-attachment: scroll,就设置了当元素滚动时,元素背景也必需随着滚动。简而言之,背景是紧贴元素的。这是 background-attachment 默认值。
用一个例子来更清楚地描述下:

1.
2.
3.
4.
5. background-image: url(test-image.jpg); background-position: 0 0; background-repeat: no-repeat; background-attachment: scroll;
background-position CSS背景background、background-position使用详解

当向下滚动页面时,背景向上滚动直至消失。(www.61k.com)
但是当设置 background-attachment 为 fixed 时,当页面向下滚动时,背景要待在它原来的位置(相对于浏览器来说)。也就是不随元素滚动。
用另一个例子描述下:

1.
2.
3.
4. background-image: url(test-image.jpg); background-position: 0 100%; background-repeat: no-repeat; background-attachment: fixed;
background-position CSS背景background、background-position使用详解

页面已经向下滚动了,但是图像仍然保持可见。[www.61k.com]
需要重视的一点是背景图只能出现在它父元素能达到的区域。即使图片是相对于视口(view port)定位地,如果它的父元素不可见,图片就会消失。参见下面的例子。此例中,图片位于视口(view port)的左下方,但是只有元素内的图片部分是可见的。

1.
2.
3.
4. background-image: url(test-image.jpg); background-position: 0 100%; background-repeat: no-repeat; background-attachment: fixed;
background-position CSS背景background、background-position使用详解

因为图片开始在元素之外,一部分图片被切除了。[www.61k.com]
扩展:css position 详解 / css position属性详解 / background position
三 : CSS背景background、background-position使用详解
CSS背景background、background-position使用详解
这篇文章主要介绍了CSS背景background、background-position使用方法,需要的朋友可以参考下
背景(background)是css中一个重要的的部分,也是需要知道的css的基础知识之一。这篇文章将会涉及css背景(background)的基本用法,包括诸如 background-attachment 等的属性,也会介绍一些有关背景(background)的常用技巧,以及 css3 中的 背景(background)(包含4个新的背景(background)属性)。
css2 中的背景(background)
概述
CSS2 中有5个主要的背景(background)属性,它们是:
* background-color: 指定填充背景的颜色。
* background-image: 引用图片作为背景。
* background-position: 指定元素背景图片的位置。
* background-repeat: 决定是否重复背景图片。
* background-attachment: 决定背景图是否随页面滚动。
这些属性可以全部合并为一个缩写属性: background。需要注意的一个要点是背景占据元素的所有内容区域,包括 padding 和 border,但是不包括元素的 margin。它在 Firefox, Safari ,Opera 以及 IE8 中工作正常,但是 IE6 和 IE7 中,background 没把 border 计算在内。

基本属性
背景色(background-color)
background-color 属性用纯色来填充背景。有许多方式指定这个颜色,以下方式都得到相同的结果。

1.
2.
3.
background-color: blue; background-color: rgb(0, 0, 255); background-color: #0000ff; background-color 也可被设置为透明(transparent),这会使得其下的元素可见。 背景图(background-image)
background-image 属性允许指定一个图片展示在背景中。可以和 background-color 连用,

因此如果图片不重复地话,图片覆盖不到地地方都会被背景色填充。代码很简单,只需要记住,路径是相对于样式表的,因此以下的代码中,图片和样式表是在同一个目录中的。
但是如果图片在一个名为 images 的子目录中,就应该是:

糖伴西红柿:使用 ../ 表示上一级目录,比如 background-image: url(../images/image.jpg); 表示图片位于样式表的上级目录中的 images 子目录中。有点绕,不过这个大家应该都知道了,我就不详说了。
背景平铺(background-repeat)
设置背景图片时,默认把图片在水平和垂直方向平铺以铺满整个元素。这也许是你需要的,但是有时会希望图片只出现一次,或者只在一个方向平铺。以下为可能的设置值和结果:

1.
2.
3.
4.
5. background-repeat: repeat; /* 默认值,在水平和垂直方向平铺 */ background-repeat: no-repeat; /* 不平铺。图片只展示一次。 */ background-repeat: repeat-x; /* 水平方向平铺(沿 x 轴) */ background-repeat: repeat-y; /* 垂直方向平铺(沿 y 轴) */ background-repeat: inherit; /* 继承父元素的 background-repeat 属性*/

【重点】背景定位(background-position)
background-position 属性用来控制背景图片在元素中的位置。技巧是,实际上指定的是图片左上角相对于元素左上角的位置。
下面的例子中,设置了一个背景图片并且用 background-position 属性来控制它的位置,同时也设置了 background-repeat 为 no-repeat。计量单位是像素。第一个数字表示 x 轴(水平)位置,第二个是 y 轴(垂直) 位置。
1.
2.
4.
5. /* 例 1: 默认值 */ background-position: 0 0; /* 元素的左上角 */ 3. /* 例 2: 把图片向右移动 */ background-position: 75px 0;
6.
7.
8.
10. /* 例 3: 把图片向左移动 */ background-position: -75px 0;

9. /* 例 4: 把图片向下移动 */
11. background-position: 0 100px;
background-position 属性可以用其它数值,关键词和百分比来指定,这比较有用,尤其是在元素尺寸不是用像素设置时。
关键词是不用解释的。x 轴上:
* left* center* right
y 轴上:
* top* center* bottom
顺序方面和使用像素值时的顺序几乎一样,首先是 x 轴,其次是 y 轴,像这样:

使用百分数时也类似。需要主要的是,使用百分数时,浏览器是以元素的百分比数值来设置图片的位置的。看例子就好理解了。假设设定如下:

This goes 100% of the way across the image (i.e. the very right-hand edge) and 100% of the way across the element (remember, the starting point is always the top-left corn
er), and the two line up there. It then goes 50% of the way down the image and 50% of the way down the element to
line up there. The result is that the image is aligned to
the right of the element and exactly half-way down it. 糖伴西红柿:这一段没想到合适的翻译,保留原文,意译。
update: 感谢天涯的指教,这段搞明白了。使用百分数定位时,其
实是将背景图片的百分比指定的位置和元素的百分比位置对齐。也
就是说,百分数定位是改变了背景图和元素的对齐基点。不再像使用像素和关键词定位时,使用背景图和元素的左上角为对齐基点。
例如上例的 background-position: 100% 50%; 就是将背景图片
的 100%(right) 50%(center) 这个点,和元素的 100%(right) 5
0%(center) 这个点对齐。

这再一次说明了,我们一直认为已经掌握的简单的东西,其实还有我们有限的认知之外的知识。
一半,效果和 background-position: right center; 一样。

背景附着
background-attachment 属性决定用户滚动页面时图片的状态。三个可用属性为 scroll(滚动),fixed(固定) 和 inherit(继承)。inherit 单纯地指定元素继承他的父元素的 background-attachment 属性。
为了正确地理解 background-attachment,首先需要明白页面(page)和视口(view port)是如何协作地。视口(view port)是浏览器显示网页的部分(就是去掉工具栏的浏览器)。视口(view port)的位置固定,不变动。
当向下滚动网页时,视口(view port)是不动的,而页面的内容向上滚动。看起来貌似视口(view port)向页面下方滚动了。如果设置 background-attachment: scroll,就设置了当元素滚动时,元素背景也必需随着滚动。简而言之,背景是紧贴元素的。这是 background-attachment 默认值。
用一个例子来更清楚地描述下:

1.
2.
3.
4.
5. background-image: url(test-image.jpg); background-position: 0 0; background-repeat: no-repeat; background-attachment: scroll;

当向下滚动页面时,背景向上滚动直至消失。
但是当设置 background-attachment 为 fixed 时,当页面向下滚动时,背景要待在它原来的位置(相对于浏览器来说)。也就是不随元素滚动。
用另一个例子描述下:

1.
2.
3.
4. background-image: url(test-image.jpg); background-position: 0 100%; background-repeat: no-repeat; background-attachment: fixed;

页面已经向下滚动了,但是图像仍然保持可见。
需要重视的一点是背景图只能出现在它父元素能达到的区域。即使图片是相对于视口(view port)定位地,如果它的父元素不可见,图片就会消失。参见下面的例子。此例中,图片位于视口(view port)的左下方,但是只有元素内的图片部分是可见的。

1.
2.
3.
4. background-image: url(test-image.jpg); background-position: 0 100%; background-repeat: no-repeat; background-attachment: fixed;

因为图片开始在元素之外,一部分图片被切除了。
四 : CSS中background-position属性说明
1.五 : 用jQuery background-position插件创建导航条效果
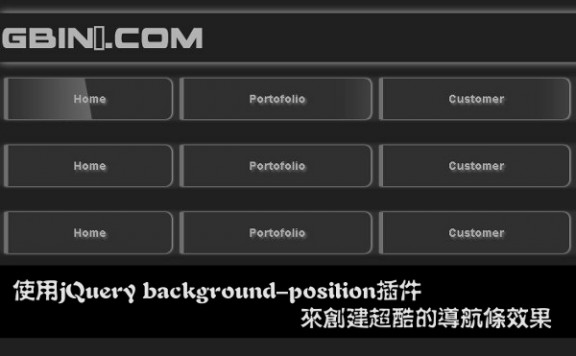
在线演示 本地下载
在过去的web开发和设计中,大家往往使用flash来创建炫酷的菜单效果,随着js和web技术的发展,现在大家可以使用简单的javascript代码生成同样漂亮的菜单效果,在今天的这个简单教程中,我们将带领大家使用jQuery的background-position插件来开发漂亮的导航条效果,希望大家喜欢!
相关插件:jQuery background-position
主要思路
在这个特效中,我们使用jQuery的background-position插件来动画背景的位置来达到背景变化的特效。你可以使用正负的背景图片坐标位置来定义动画的过程,注意这里你需要自己创建一个合适的背景图片来加强这种动画效果。这里我们使用如下几张图片:


当我们动态的移动背景图片位置的时候,可以产生波浪或者淡入淡出,或者倾斜移动效果。
HTML代码
html代码很简单,用ul生成导航菜单的框架,如下:
<ul id="nav1">
<li><a href="#">Home</a></li>
<li><a href="#">Portofolio</a></li>
<li><a href="#">Customer</a></li>
<li><a href="#">About</a></li>
<li><a href="#">Contact</a></li>
</ul>
<br /><br />
<ul id="nav2">
<li><a href="#">Home</a></li>
<li><a href="#">Portofolio</a></li>
<li><a href="#">Customer</a></li>
<li><a href="#">About</a></li>
<li><a href="#">Contact</a></li>
</ul>
<br /><br />
<ul id="nav3">
<li><a href="#">Home</a></li>
<li><a href="#">Portofolio</a></li>
<li><a href="#">Customer</a></li>
<li><a href="#">About</a></li>
<li><a href="#">Contact</a></li>
</ul>
这里我们生成3个导航菜单,分别使用不同的jQuery动画菜单效果。
CSS代码
css代码定义了每个菜单<a>标签的背景图片,如下:
#nav1 li a {
display:block;
padding: 0px 80px;
height:100%;
color:#AAA;
text-decoration:none;
text-shadow: 2px 2px 2px #707070;
font-weight: bold;
border-left: 5px solid #707070;
background:url(../images/light.png) repeat 0 0;
}
#nav2 li a {
display:block;
padding: 0px 80px;
height:100%;
color:#AAA;
text-decoration:none;
text-shadow: 2px 2px 2px #707070;
font-weight: bold;
border-left: 5px solid #707070;
background:url(../images/light2.png) repeat 0 0;
}#nav3 li a {
display:block;
padding: 0px 80px;
height:100%;
color:#AAA;
text-decoration:none;
text-shadow: 2px 2px 2px #707070;
font-weight: bold;
border-left: 5px solid #707070;
background:url(../images/light3.png) repeat 0 0;
}
Javascript代码
在js代码中,我们调用简单的js就可以动态的控制背景图片位置,如下:
/*
GBin1 Navigation Effect
*/
$(document).ready(function(){
$('#nav1 a')
.css( {backgroundPosition: "0 0"} )
.mouseover(function(){
$(this).stop().animate(
{backgroundPosition:"(-280px 0px)"},
{duration:1000})
})
.mouseout(function(){
$(this).stop().animate(
{backgroundPosition:"(0 0)"},
{duration:1000})
});
$('#nav2 a')
.css( {backgroundPosition: "0 0"} )
.mouseover(function(){
$(this).stop().animate(
{backgroundPosition:"(300px 300px)"},
{duration:1000})
})
.mouseout(function(){
$(this).stop().animate(
{backgroundPosition:"(0px 0)"},
{duration:1000})
});
$('#nav3 a')
.css( {backgroundPosition: "0 0"} )
.mouseover(function(){
$(this).stop().animate(
{backgroundPosition:"(300px 250px)"},
{duration:1000})
})
.mouseout(function(){
$(this).stop().animate(
{backgroundPosition:"(0 0)"},
{duration:1000})
});
});
在以上代码中,我们控制鼠标移入链接和移出链接的操作,这个时候,background-position插件会帮助我们生成正确的动画效果。
具体效果,请查看在线演示,希望大家喜欢这个特效,只要你有足够好的想象力,你可以开发出变化无穷的菜单特效,如果你有任何建议和问题,请给我们留言,谢谢!
来源:使用jQuery background-position插件来创建超酷的导航条效果
本文标题:background-position-CSS样式:background-position的理解61阅读| 精彩专题| 最新文章| 热门文章| 苏ICP备13036349号-1